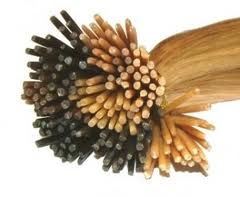
 My hair does not grow! My mother is a hair stylist and even she can’t give me guidance on how to make my poor pathetic locks longer, so I want hair extensions, particularly micro bead hair extensions, because they are the most cost effective and least damaging choice, especially if you make your own fusion tips.
So that is what I am going to do. I am going to make my own fusion, also known as I-tip, extensions. This is an intermediate to advanced project that requires attention to detail and nimble fingers. It is also time consuming so make sure you are ready to put in the work to get quality tips.
Materials:
Hair– 100% human hair is best. Don’t scrimp it’s going on your head, you want it to look good.
Liquid Gold– buy it where hair is sold. I stand by this being the best product, but beware it is reeeaallly sticky
Liquid Gold Remover– optional but it does help get the glue off your fingers
Scissors– the sharper the better
micro beads– to test the hair with so you don’t waste time, like I did my first go around.
cardboard– to do your work on. Again, the liquid gold is unbelievably sticky.
Note about hair: Don’t scrimp on the hair you buy, find a good hair store and ask for the best quality. As you probably have noticed the fusion hair is a lot more expensive than wefts or loose hair, so I am using a weft of hair instead. It will make more hair than I will need (100-150 strands for fine to medium hair) and it costs a lot less. (Note: this does not mean I am sacrificing quality, just getting the same great quality hair in a different form)
Note about Liquid Gold: it will get everywhere if you let it. DO NOT tap the brush on the side of the bottle. The glue is so sticky it will form a wall and you won’t be able to use it anymore. Just draw the brush out and give it a second to drip the excess off before pulling it straight out of the bottle. Find a happy medium with the amount you use, you need enough to actually hold the piece together but not too much or too little. Always keep the bottle closed when you aren’t using it, it dries quickly.
Step 1: Cut your Hair
The most important thing to remember is that less is more. You need your real hair and your extension to fit in to the tiny hole of that bead so make sure you stay well under 1/2″ when cutting your pieces. I did 1/2″ pieces my first go around and I ended up having to cut them in half because they wouldn’t fit! Therefore, I have found that the best size is 1/4″ pieces but if you want to go bigger, do so at your own risk.
Step 2: Glue your Pieces
Take one piece of hair and lay it on the cardboard. Don’t put glue on the top string part(you will cut this later) Apply glue to one side (about 1/4″ down), flip it over and apply glue to the other side. Let it dry for 30 seconds before picking it up (less glue will get on your fingers this way). Take the piece of hair by the top strings and begin twisting it with your free hand.It needs to be twisted as small and tight as possible.Once the glue starts drying it will get tacky, use that to your advantage because it helps to keep the piece twisted.
Make sure you don’t get carried away and get glue all down your hair. you want it to be no more than 1″ long, otherwise you run the risk of it showing when its in your hair. Also, you are going to have to constantly remove glue from your fingers so it doesn’t cause build up, use the remover…it helps.
Do this to all of your pieces, set them in a clear dry space to set. It doesn’t take long, about 10 minutes. I left mine overnight just in case. Note: the glue will never get completely hard and dry, it will remain slightly tacky but it won’t be tacky enough to stick to your hair.
Step 3: Cut the Excess
Now that your pieces have dried, go back and cut off the tops (where the string is). This is where you need the sharp scissors. Go slow when you are cutting. If you don’t get a clean cut you will pull strands of hair through the middle of your piece making a mess. Cut slow and you wont have that problem. Once you cut the excess dab more liquid gold on the top to seal the piece. (preventing any of the hairs in the middle from escaping)
Let it set again and you are done.
Step 4: Inserting the Micro Bead Hair Extensions
I found a great tutorial on youtube for inserting the extensions. It is posted by DonnaBellaHair: http://www.youtube.com/user/donnabellahair
Also you can check out: hairextensionforum.com
I was able to get a lot of good information and encouragement from there.
